Mostrando entradas con la etiqueta Dessert. Mostrar todas las entradas

martes, 23 de octubre de 2012

Bacon sky

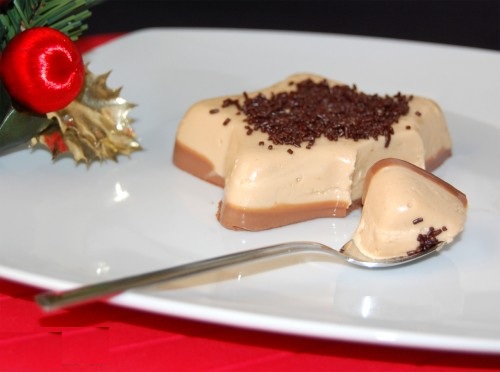
Bacon Heaven is a dessert made primarily with egg yolk and sugar. This traditional dessert is a treat after a good meal.
Bacon sky has traditionally drawn around the southern Iberian Peninsula. In the Region of Murcia is made by adding a little cinnamon and lemon syrup.
The bacon from heaven has a taste and texture very peculiar. It is a dessert that is always degustándose multiple times.
Ingredients for four people
Sugar 450 g10 egg yolks1 cup waterCaramelLemon peel1 cinnamon stick
Method of preparation
Step 1: Prepare the syrup
- Put the water and sugar in a saucepan, over low heat for about 20 minutes until it takes consistency. In the cooking process will use a cinnamon stick and a little lemon peel, which will later be removed.
- It is allowed to cool. The syrup should have a consistency such that, if we take two fingers slightly parted and must form a fiber of about four inches without breaking.
Step 2: Break the yolks
- In a deep bowl, place egg yolks ten. They break and mingle, without producing foam. Then slowly add the syrup, which should be cool, not to curdle the egg. He moves well for the overall well blended.
Step 3: When mold with caramel
- Molds are prepared, caramelizing inside. Failure to be prepared caramel. They put three tablespoons of sugar and the same number of water in pan, heated on the fire until the sugar melts and re-crystallize on the walls.
Step 4: In double boiler for cooking
- Then pour the yolks and syrup mixed in the mold through a sifter to prevent lumps from sneaking.
- Is introduced into a steam cooker to cook or in the oven. At equivalent steam-bath but with the difference that the water does not touch the mold and the pot is closed, so that the heat of steam which performs the cooking.
- This process can take about twenty minutes, during which the pot should not be opened.
- Again, it is found that the mixture is curds out of the pot and allow to cool.
Finally the mold removed, placed in bowls or on a platter and cut to taste.
Table and accompanying presentation
Bacon sky comes in individual portions or in a cake. This is a dessert that has traditionally accompanied roasts and rice in the holidays. Its texture and flavor make it perfectly combinable with strawberries, bananas and peaches. So that may occur accompanied by a simple salad. Another way is to enrich this dessert with whipped cream or ice cream. But it certainly is a treat by itself and needs no additions.
 

domingo, 21 de octubre de 2012

Sweet Pumpkin

Presentation of the dish:

    
Easter dish, or any time of the year, provided there is good pumpkins in parts of the Region as Lorqui Ceutí, Archena ... is that in these lands are cultivated pumpkins more appropriate to prepare this sweet. A simple recipe for dessert that was taken with meals or as a jam for breakfast. Economic, easy to make, tasty and healthy.
Ingredients: Sugar
- A quarter of a pumpkin
- Sugar
- Cinnamon
- Olive oil soft
Preparation:
First step: Pumpkin

    
We started cutting into elongated squash courts. We put them in a baking dish and cook for 20 minutes at 150 º to lose water faster and frying. This step is not necessary, can also be done directly in the pan, and be patient until the water is absorbed.

    
Once you remove the skin roasted and cut into pieces. In a frying pan with a little oil and gently toss the diced squash, fry a few minutes.
Second step: sugar and cinnamon

    
Then is time to take 4 tablespoons of sugar and a dusting of cinnamon. Move well and let another minute to melt the sugar. Aside.
Third step: we serve

    
With a skimmer we get the sweet pumpkin leaving the remaining oil in the skillet. We report on a plate to cool and hope because ideally it cold as if it were a dessert. Before removing the table sprinkle sugar and cinnamon on top.
Presentation and accompanying table:

    
We have made our dessert, we will hold a sweet few days at home. The flavor is very reminiscent to cinnamon sweet but adds a delicious ... despite being only pumpkin and sugar!

    
Once again surprise us old recipes, they knew exploit the raw material to its full potential.

    
You know, with spoon or spread on a slice of bread (like a jam) ... dessert lifetime.

    
It is also very rich with a little cheese, hard or soft, the diner's taste.
 

viernes, 19 de octubre de 2012

Nougat Chocolate Cake

Well as you know I'm trying to publish special recipes for Christmas and so I have not hesitated to make a variant of nougat cake the other day (with nougat Jijona) using this time a nougat chocolate (Suchard or crunchy kind puffed rice).

Practically it is like the other recipe except for a few differences. For the base I used chocolate cookies type "Granola" (with a face covered in chocolate and the other does not). If you can not find them using graham crackers and add 20 to 30 grams of chocolate you like best cast. Moreover this time we will not pass the mixture through the blender with nougat cream because the chocolate nougat (unlike Jijona nougat) melts very easily if we put the fire along with the cream. 
Ingredients to make Chocolate Nougat Cake (for 8-10 people):

    
4 large eggs
    
400 ml of cream for cooking
    
300 grams of chocolate frosting (the crunchy kind Suchard)
    
75g unsalted butter
    
50 grams of sugar (about 3 tablespoons)
    
15 cookies with chocolate granola type (about 250 grams)
    
40 grams of black chocolate for grating over
Recipe for Chocolate Nougat Cake (for eight or ten people):

    
Put the cream in a saucepan to heat over medium heat. When hot (not boiling, just hot) made the crunchy nougat chunks and simmer on low to melt everything.
    
Meanwhile in a large bowl add the eggs and sugar. Beat with the rods until a homogenous mixture, creamy and not too frothy.
    
When it has melted nougat cream off the heat and mix away. Throw in the eggs and sugar, mix well (without stirring) and let stand off the heat. Put the oven heated to 180 ° C.
    
Melt butter (use the microwave is faster). With mixer crushed cookies and check them over melted butter. If you are using Mary crackers (without chocolate) uses 25 cookies instead of the 15 that the recipe (since they are smaller type cookies Mary) and añádeles 20 or 30 grams of melted chocolate.
    
Take the mixture of butter and crackers and distribute them to the base of a removable mold of 24 cm. Pressed against the bottom with a spoon or your fingers (if it's more comfortable). We have based our list nougat chocolate cake.
    
Now poured onto the biscuit base mix all we reserved and put it in the oven at 180 ° C for about 35 minutes. The cake is done when a toothpick goals (Wood) comes out clean.
    
While the cake is in the oven grate 40 grams of black chocolate on a piece of aluminum foil.
    
When the cake out of the oven and sprayed with the grated chocolate (Ayúdate piece of foil using it as a funnel to properly distribute across the surface of the cake). The chocolate will melt away, do not touch it with your fingers or marks remain.
    
Leave tune and then shoves cake in the refrigerator for 4 or 5 hours. Off the kitchen and get lunch!
To eat:
At sprinkle with grated chocolate over hot cake forms a molten chocolate with a great looking. If it drops too much chocolate on an area of ​​the pie and not try to rectify that immediately melted chocolate and touching are very ugly marks. If you find that you're missing chocolate to cover the entire surface of the pie and mash a little more ready.
The cake can serve it cold or at room temperature, but it is good to spend a few hours in the fridge to take shape. Also remember that you should not take eggs and let her out of the cold too long.
If you can try different combinations with chocolates of different flavors (white, bitter, etc) and different coverages
 

jueves, 18 de octubre de 2012

Rice Pudding Mousse

Rice Pudding Mousse. After stuffed piquillo peppers and tenderloin medallions, and we have the full menu of our romantic dinner with this dessert you can submit as mousse or ice cream if you leave it in the freezer.

To prepare this dessert first need to prepare a rice pudding with 100 grams of rice. But if you're short of time you give a tip of the chef himself more impostor Network (Falsarius Chef), you can make this same recipe with rice pudding store-bought, but will not know just save time.
Ingredients for Rice Pudding Mousse (serves 4):

    
Milk pudding
    
500 ml of whipping cream
    
4 tablespoons icing sugar
    
chocolate to decorate
Recipe for Rice Pudding Mousse (for four people):

    
Prepare rice pudding using this recipe. Do as shown in the recipe but employs only 100 grams of rice (instead of 200 grams) and not change the amounts of the other ingredients.
    
When you have prepared rice pudding (and still warm) add 100 ml of cream (not mounted) and pass everything through the blender, it has to be as thin as possible.
    
Place the mixture on a sieve and with the aid of a ladle will press to separate the cream from rice. Collect the cream in a pileup and discard pound rice.
    
Let her temple and then put it in the fridge. Let there for 1 hour.
    
Past the hour ride the rest of the cream with the icing sugar. When properly mounted add half of the cream in a creamy rice pudding and tries to mount this mixture with electric rods. Can not be mounted, but will mix everything well, catch some air and becoming more fluffy.
    
Now add this mixture to the remaining whipped cream and mix well outflanking (careful now that the whipped cream does not lose its volume).
    
When well blended divided into four sundaes and put in the freezer for 30 minutes, then goes to the fridge and leave it there until just before serving. Off the kitchen and to eat!
To eat:
If you prefer to take as rice pudding ice cream rather than as mousse, then you better put it all in a pileup (instead of four cups). Put it in the freezer half an hour, take it out with a spoon and stir the mixture well. , Put in the freezer and take it out five minutes before serving. It will be very fluffy ice cream.
This dessert has a very mild flavor, if you want to enhance its flavor adds chocolate sprinkles or scratches (like the picture). The latter are more delicate and are perfect with a mousse. To them you just have to melt (a double boiler or in microwave) some chocolate, spread it very thin on a marble or granite countertop and dry when scratched with the edge of a sharp knife.
 

miércoles, 17 de octubre de 2012

Caramel liquid

Caramel. How many times have you tried doing a minute and caramel candy is hard as a rock? Do not know about you but I happened to lots of occasions. You put the sugar to melt, alone or with a little water, caramel begins to be created, it seems that everything is fine but then cooled and a nice caramel stays like a rock unusable if not for piñonate
Lest you return to your problems with caramel let's see how to do it step by step and at the end of the recipe will give you some tips to solve some problems that may occur while you prepare the caramel but before proceeding read the following.
Working with caramel NO CHILD'S PLAY, candy can reach temperatures of 200 ° C (at 170 and bit already to throw) and therefore must be very careful when handling hot caramel then burns that cause serious. My advice is that you use a washcloth to cook (of the kind used to remove them from the oven) and while doing the candy is only aware of this.
Before starting this article leed safety when cooking with sugar at high temperature and then .... to the kitchen!
Ingredients for making liquid candy (for 1 mold of 25 cm in diameter):

    
200 grams of sugar (normal)
    
1 cup water
Recipe for Liquid Candy (for 1 mold of 25 cm in diameter):

    
Before starting to cook read these safety tips on the hot sugar.
    
Grab a bucket and put a glass of water on to boil.
    
Take another pan, best if a thick bottom, and add the sugar. Place over medium heat and let it get into a candy slowly. Do not be hurry!
    
When all the sugar has become candy have to be very careful because you can burn at a time and then it will become very dark with a very bitter taste.
    
When the caramel has a golden hue (note the photo candy) take a tablespoon of boiling water and pour it over the caramel (the knob used for jumps and steam can escape). Then add 11 tablespoons more (a total of 12 tablespoons water) and stir with spoon.
    
Keep the candy fire while mixing with water to mix better. As well blended removed the pan from the heat and let cool. Care to burn much, do not you dare try until thoroughly cold!
To eat:
It is important to use a pot (or other kitchen pileup) with thick bottom so that the heat is distributed evenly and caramelize the sugar is more or less simultaneously. If you have no heavy-bottomed saucepan then you can always make the caramel in gas hob rather than as the first of the heat over the entire surface of the bottom and melt the sugar evenly. If you are using gas cooker and not have a heavy-bottomed saucepan have to move the pan to the flame heats the bottom.
I add six tablespoons of water per 100 grams of sugar. If when the caramel cools Once the candy was a little thicker than you wanted to relocate the fire and add boiling water slowly. To dilute the thick caramel better use a small spoon, better go slowly adding water to pass us because if we have very liquid would have to reduce the syrup and candy can be very bitter.
This candy can be stored in the refrigerator and use whenever you want and does not return the candy to get tough. I keep in the refrigerator for a couple of weeks without problems.
To clean hard candy or rebellious (this seems an advertisement for Ariel, lol) there's nothing like hot water. Put a pan of water on to boil or use hot water heater. As hard as it will be easily candy!
Do not use plastic spoons to move the candy or melt. Ideally, a metal spoon with plastic handle to insulate you from the heat that will catch the metal.
Finally if you want to spice up the candy you can replace some of the water by tablespoons liqueur flavor you prefer, you can also add a few drops of lemon or orange or even some coffee. Make It Your Own!
Hope you like this recipe and remember to be careful with the hot caramel. Soon we will have more recipes. Greetings cooks.
 

domingo, 14 de octubre de 2012

Black Chocolate Mousse

Black Chocolate Mousse. Here's the promised chocolate mousse for Valentine's Day in a special step for anyone having problems when preparing this mousse at home;)

By the way, if you make ready the day before mousse much better, as this will catch body mousse in the fridge and will be much richer. I think I give the recipe well in advance so you can find the ingredients and prepare well for your romantic dinner. So you know .... to the kitchen!

Ingredients for Chocolate Mousse Black (for 2 people):

     100 grams of black chocolate or special dessert to melt
     65 grams of sugar (about 3 tablespoons)
     15 grams of unsalted butter
     2 large eggs (XL)
     1 tablespoon water

Recipe for Chocolate Mousse Black (for two people):

1) Let's do a little legwork to make it work well the chocolate mousse and the times between the different phases are very important. So grab the eggs and separate the whites from the yolks. Finely chop the chocolate. Weigh the butter and sugar.

2 º) Now mount the egg whites with 1 tablespoon sugar. It is best to mount a little light and they begin to take sugar add body and end mounting. They must be well hard
3rd) Add remaining sugar (2 tablespoons) to the egg yolks and beat with a whisk until foamy and somewhat whitish.
Black Chocolate Mousse - Mount Buds
4) Take the chopped chocolate and stir in butter and water. Melt it all (in a double boiler, microwave or in a saucepan over very low heat) and mix well. Then let the mixture to warm but not cool completely, then add the egg yolks and mix well.
Black Chocolate Mousse - Melt chocolate
5th) then added as a third of the egg whites that have mounted and bien.Luego mixture add the remaining egg whites and mix with outflanking to not lose the air that is trapped in the clear.
Black Chocolate Mousse - Chocolate Mix and clear
6th) Finally filled vessels which go to serve the mousse (choose a nicer than mine) and let the mixture settle for half an hour before putting your fridge well covered. Leave in the cold at least 3 hours, but it's best to leave the mousse overnight, it gets more body and a more pronounced flavor. Off the kitchen and get lunch!Black Chocolate Mousse
To eat:
This is a recipe I do not recommend doing in summer unless you have great confidence in the eggs you use. Like when we mayonnaise in this recipe are raw eggs, which can cause digestive problems and various health if eggs are not able. So you know, to make the chocolate mousse you use very fresh eggs and if you're with the summer heat better leave.
You do not use sugar to make the meringue (egg whites with sugar) as carrying a small amount of sugar the mixture is not saturated and the sugar melts in the egg white. If we make a meringue with sugar would be nothing more ;)
I said in the recipe that are important times and now I understand why. Once melted chocolate can not directly add egg yolk as it would bake (and would come together) spoiling our mousse. So you have to wait for warm up. But we can not let it cool completely for what would come together in this case would be the chocolate and butter mixture.
Once you add the yolks to chocolate this will cool even more (because the yolk is usually cold from the fridge) and can cause the mixture to set (and this is a problem) so we added some clear quickly mounted. Thus we get the mixture a little release and secondly we match the texture a little of this mixture with the egg whites until stiff.
This is very important because if we add a mixture too hard to provoke clear these down and lose air and therefore lose the fluffiness you must have a mousse.
Well, after all this stuff I hope you are looking forward to prepare the recipe. Do not fail to tell me how you came out your chocolate mousse and do not be discouraged if you do not it goes to the first point you have to catch him so that you stay well creamy mousse. Anyway I hope that you will leave yummy
 

sábado, 13 de octubre de 2012

Vanilla Cake

Vanilla cake. Some time ago I published a recipe not sweet and so today I bring this vanilla cake that is prepared very quickly and with little mess pots.

Also with this recipe you can use to prepare a delicious cake with vanilla shakes those you have in the fridge and they are about to expire
Ingredients to make (for about 12 servings):

    
200g unsalted butter
    
400 grams of wheat flour (from normal)
    
400 ml of vanilla milkshake
    
Sugar 400 g
    
Avainillada sugar 1 envelope (8 grams)
    
2 large eggs
    
1 sachet of baking powder (1 sachet of yeast Royal are 16 grams)
Recipe for making (for about 12 servings):

    
Melt butter (in the microwave or in a saucepan), let cool slightly.
    
In a large bowl whisk the two eggs, then add the butter (warm or cold but not hot) and mix well with a whisk.
    
Then add the vanilla and mix beaten with rods. If you are just out of the fridge the best vanilla milkshake is a bit warm (room temperature is ideal) so it is not too cold and thus avoid the butter to solidify.
    
Now add all the sugar (normal and vanilla) and mix with the rods. If you do not have vanilla sugar adds a teaspoon of vanilla flavor (look that is edible).
    
Time to heat the oven to 180 ° C above and below.
    
In a bowl large enough to hold the entire mixture add the sifted flour. Add baking powder and mix well with a fork so that the yeast is distributed throughout the flour.
    
Now go adding the liquid mixture (batter, eggs, butter and sugar) to the flour and mix with a whisk see (if electrical better) until the mixture is homogeneous (well mixed).
    
I am just pour the mixture into the pan and bake. When poured into the mold you have two options. If you are using a silicone mold quality (like I did) just have to grease it the first time you use it but if you use another type of mold it is best to play it safe and always lubricate smearing some butter at room temperature throughout the mold to prevent sticking cake.
    
Once you have the mold ready check on it the mixture and put the pan in the oven at 180 º C. Leave for 60 minutes.
    
After this time click on the center of the cake with a toothpick or skewer and see if it comes out clean. If not you need a little more of oven, put it 10 minutes and retest again.
    
When the cake is properly baked out of the oven, let desmóldalo temple for 15-20 minutes and cool completely.
    
What are you waiting? ..... out of the kitchen and to eat!!
To eat:
As you can see from the photo I used a silicone mold pretty daisy shaped sent to me from Silikomart, but also can make the recipe with a circular mold of 22-24 cm in diameter. In this case you should always grease the pan with butter not strike you.
You can try other smoothies, with chocolate is especially rich and can also sprinkle the cake with what you like best, chocolate sprinkles, icing sugar, ...
By the way, you know I always say that every oven is different, so you must watch very well when the cake is in the oven (at least the first time you do this). From minute 40 is convenient to take a look every 10 minutes if your oven is gone from strength and you burn the cake
 

viernes, 12 de octubre de 2012

Milk fried

Leche Frita. Today we will see how to make a homemade fried milk, a dessert that reminds me of the toast of life, with its sugar and cinnamon!

There are many add egg recipe fried milk (and flavored with vanilla instead of cinnamon and lemon) and although you can also do it reminds me too much of the custard and prefer to do it as in this recipe.

You can also make the recipe with wheat flour instead of cornstarch (corn starch or corn fine flour), or use a bit of both. But I prefer to use only cornstarch, as my friend Juan Ramon (From Vista to Palate), and so the recipe is 100% suitable for celiac and allergic to gluten.

Be sure to read the tips at the end of this recipe and cooking!

Ingredients to make Fried Milk (serves 4):

     Milk: Half-Pint (500 ml)
     Sugar: 100 grams for the fried milk and 2 tablespoons for rebozarla
     Cornstarch: 40 grams for milk and a little fried batter
     Lemon peel 1 piece of one long finger
     Cinnamon stick: 1 piece of one long finger
     Cinnamon: half teaspoon batter fried milk
     Egg: 1 batter
     Oil: you can use olive oil sunflower very soft

Recipe for Leche Frita (for four people):

1) Put half the milk in a saucepan with the cinnamon stick and lemon peel. Save the rest of the milk in the refrigerator. Put on medium high and let it go until temperature reaching almost to boiling point. Then away the pot and turn off the heat. Off the heat cover the pan (with a lid or large plate) and let the milk tea with cinnamon and lemon for 20 minutes.
2nd) When the 20 minutes have passed remove the cinnamon stick and lemon. Pass the mixture through a sieve into another clean pot, add the sugar, place over medium-low and mix well. Bring the milk we had in the fridge (we had left half) and dissolved therein cornstarch (cornflour). When thoroughly dissolved add it to the pan with the hot milk.
3 º) Now let stirring with a whisk the mixture constantly over medium-low heat until thickened. If you climb the fire very quickly thicken but milk flavored fried flour will too. Best to put the pot over medium-low and let it go baking flour gradually and that is losing its flavor oil. Besides being simmering shall cling less to the bottom and have to watch a little less. It takes more to thicken milk but after'll thank fried.
4 °) depending on the temperature of the milk thicken fire will take between 20 and 40 minutes (better than less). To know when the fried milk is at its dumps the pot to one side and all the milk pushes toward that side. Then put the pan horizontally and note as milk moves. If it does not move or moves very little milk is ready, if again quickly covering the bottom left longer fire.
5 º) When the milk has thickened enough to take a mold and prevent sticking Rub with a little sunflower oil (you will not notice the taste and fine desmoldará) dipping a paper towel. Then pour the mixture into the pan and let cool in it. After the lid and refrigerator until the mixture has completely curd (gets as gelatin). It may take 2 to 4 hours before it thickens and the longer you stay in the harshest cold will.
6th) cut into pieces and fried milk curd and pass first in flour, then beaten egg. Then fry the pieces of breaded fried milk in hot oil for 1 minute or so (until you see golden on both sides).
7th) Then take the oil and put the fried milk on a plate with paper towels to absorb excess moisture. Then in another bowl mix the sugar we had booked (two tablespoons) with cinnamon powder (do not add too much or you will kill all flavors) and we are passing pieces of fried milk that involved well in the mix. And presto ... out of the kitchen and to eat! Calientes are richer!
To eat:

This recipe makes four servings of fried milk good, but as you get to the recipe you might want to double the quantities and so have for more days. If you prepare more fried milk store in the fridge tightly covered and of course without going through the egg and flour (always do this just before frying the fried milk).

It is important to change the pot so that the little milk that you were able to "grab" (paste) to the bottom and the pot does not cause the fried milk after being beating constantly while you cook the flour.

It is important to be attentive to the time when the milk will begin to boil remove from heat before it boils. The reason is that when boiled milk changes its taste and I do not like. It is best to remove the fire just before and so milk (milk and fried) remain much fresher taste.

Remember that the cornstarch does not dissolve well in hot liquids and tends to form lumps. Therefore it is important to reserve a portion of cold milk to dissolve cornstarch smoothly.

You can use the template of your choice for fried milk, you usually use one square and not too big so that the milk has at least one finger high. But it is a matter of taste;)

Hope you like the recipe and enjoy at the table with this rich dessert. Greetings from my kitchen.
      

Fruit Tart with Puff Pastry

Fruit Tart with Puff Pastry. As I passed the other day when I posted the brightness here have this pie pastry tart with custard and fruits.

The recipe is easy to prepare, but as has several parts (make the pastry cream, cover prepare, bake the puff pastry and prepare fruit) may seem less easy than it really is. Dare to prepare and you will see that is rich and good feeling in summer when you take the cake from the refrigerator and you take a piece rather chilly. To the kitchen!!

Ingredients for Pastry Tart with Fruit (for 8 people):

     1 pastry sheet rectangular
     1/2 liter of pastry cream (see recipe pastry cream)
     1 egg for brushing the pastry
     Fruit varied to your liking: peach, kiwi green and yellow kiwi, strawberries, bananas, grapes, blackberries, ....
     For transparent coverage: 2 tablespoons sugar, 1 cup water and 1 envelope brightness pie (or 1 envelope of gelatin neutral)

Recipe for Fruit Tart with Puff Pastry (for eight people):

1) Put the pastry in front of you and then bends upward an inch (more or less) on each side of the sheet. Press with your fingers around the edge to stick well (look at the picture).
2 °) Put the oven heated to 200 ° c. Then whisk the egg and pukes. With a paint brush with egg around the edge of the pastry (eye, only EDGE).
Brush pastry with beaten egg
3rd) with a fork then click around the center (EYE CENTER ONLY) then puts the pastry in the oven. Leave it there for about 20 or 25 minutes at 200 ° C until golden brown.
Bake pie pastry
4) While the pastry is done you can take to prepare the custard. Here's the recipe for pastry cream, prepare it and let it cool before placing it on the pastry.
Prepare custard tart pastry for
5 º) When the pastry and custard are cool put the pastry cream over the pastry.
Puff pastry tart with custard
6th) Now is the time to put the fruit over the cake. Pick the fruit of your choice and distributed over the custard. Then prepare the pie brightness (here's the recipe) and brush over the entire cake (except for the edges). It is important that you read the end of the recipe to find out more about coverage for cakes.
Decorate cake with fresh fruits
7th) Carefully cover the cake and put it in the fridge (refrigerator) for a couple of hours until the topping (brightness) take consistency. And ready ...... out of the kitchen and to eat!!
Puff pastry tart with fruit and custard
To eat:
When brush with egg may be tempted to take advantage of all the whole brushing egg puff rather than just the edge of the pastry. Do not, if you do the egg can block the holes that we have in the center of the pastry. When the air is not locked away and the pastry starts to grow in the middle. If this occurs the pastry swells and will not be fine for the center, which prevent us then place the pastry cream and fruit.
You have to let the pastry and custard to cool before putting the pastry cream over the pastry. If one of the two things is hot, the heat and steam will reblandecerán the pastry and lose its texture (it will be very soft and slightly crispy).
The other day we saw how to prepare a transparent cover cakes and there explained that when we use fruits like kiwi can have problems getting coverage curdle well because these fruits "dissolve" the gelatin protein. I have prepared the cake you see in the picture above with transparent cover we saw the other day on the blog and has caught perfectly. But if you have the option of using a specific product brightness pie I recommend it as well because it curdles you avoid problems quickly and effectively.